
Add Webchat
Channel Configuration in Creatio
Section titled “Channel Configuration in Creatio”-
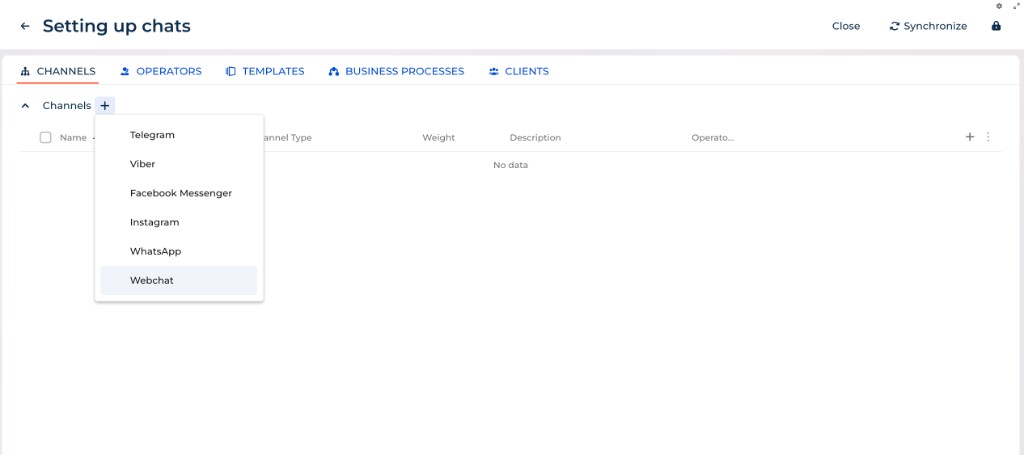
Click the ✚ icon next to Channel
-
Choose Webchat
-
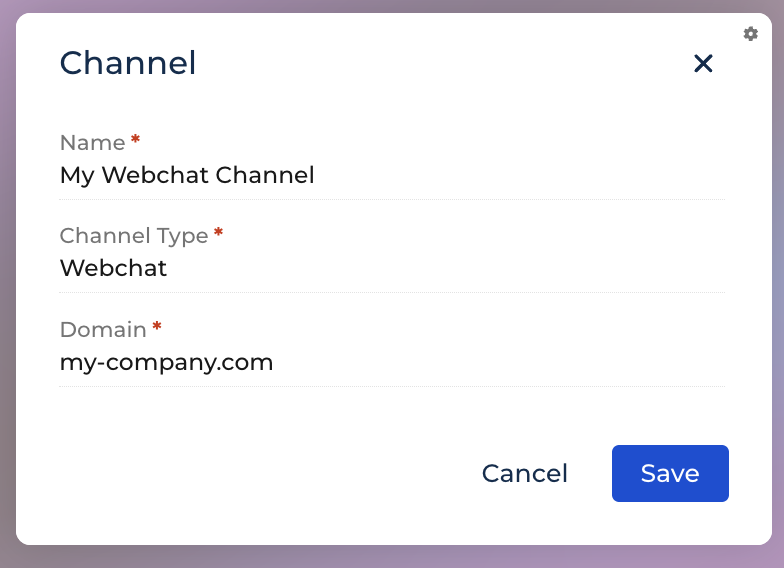
Enter the Name of your channel
-
Enter the Domain of the website where the widget will be placed (e.g.
my-company.com) -
Click the Save button
Installing the Widget on Your Website
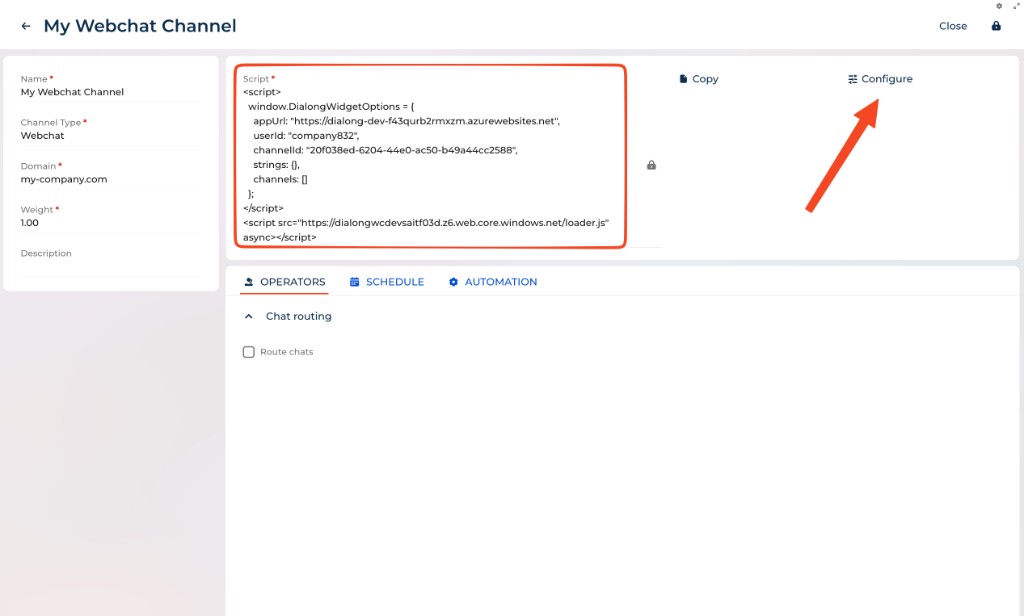
Section titled “Installing the Widget on Your Website”After the channel is created, you will see the generated Script on the channel page.
-
Click the Copy button to copy the widget script
-
Paste the script into your website’s HTML, at the end of the
<body>tag -
Save and publish your website
Customizing the Widget
Section titled “Customizing the Widget”To customize the look and feel of your widget:
-
On the channel page, click the Configure button
-
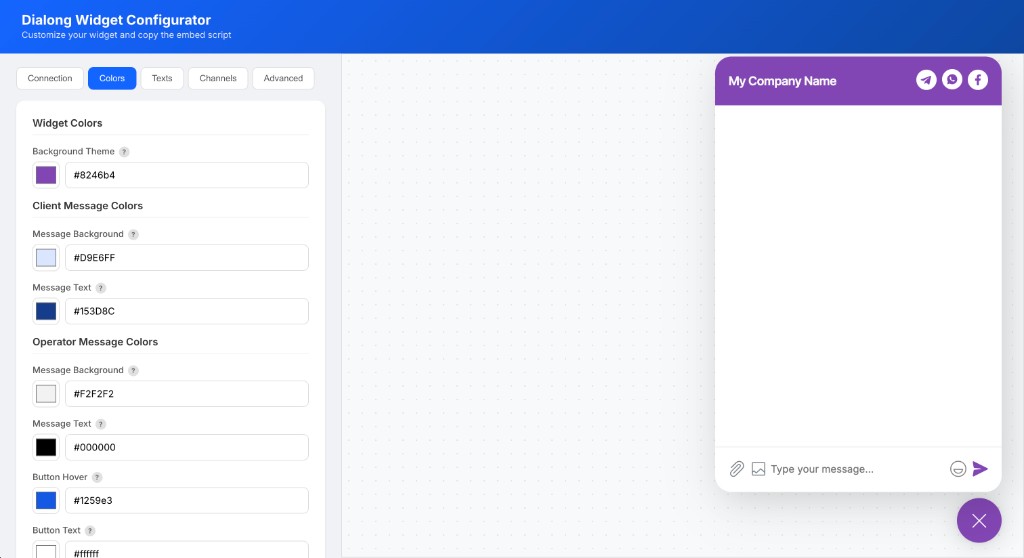
The Dialong Widget Configurator will open, where you can customize:
- Colors — background theme, client and operator message colors, button colors
- Texts — widget title, placeholder text, system messages
- Channels — additional messaging channels to display in the widget header
- Advanced — additional settings
Next steps are described here: Channels