Channels
Channel Configuration
Section titled “Channel Configuration”Pre-condition: A channel has already been added and now needs to be configured.
Operators tab
Section titled “Operators tab”- Add Weight* for chats received through this channel. You can read what Weight of the channel means here.
- You can add a Description for your channel. The maximum length is 250 characters.
- You can check Include Operator Name, and your client will see the operator’s name in their messenger.
- Check Route chats*
- Choose the Chat Routing Strategy Type* — click the 🔍 and select “The most idle operator who is online”.
- Click the Select button
Select how incoming chats should be routed:
If you select To Operators, then:
- Click the ✚ icon next to Operators to add operators who will receive the chats.
- Select one or more operators
- Click the Select button
If you select To Operator Group, then:
- Click the 🔍 icon next to Operator Group
- Select one operator group
- Click the Select button
Schedule tab
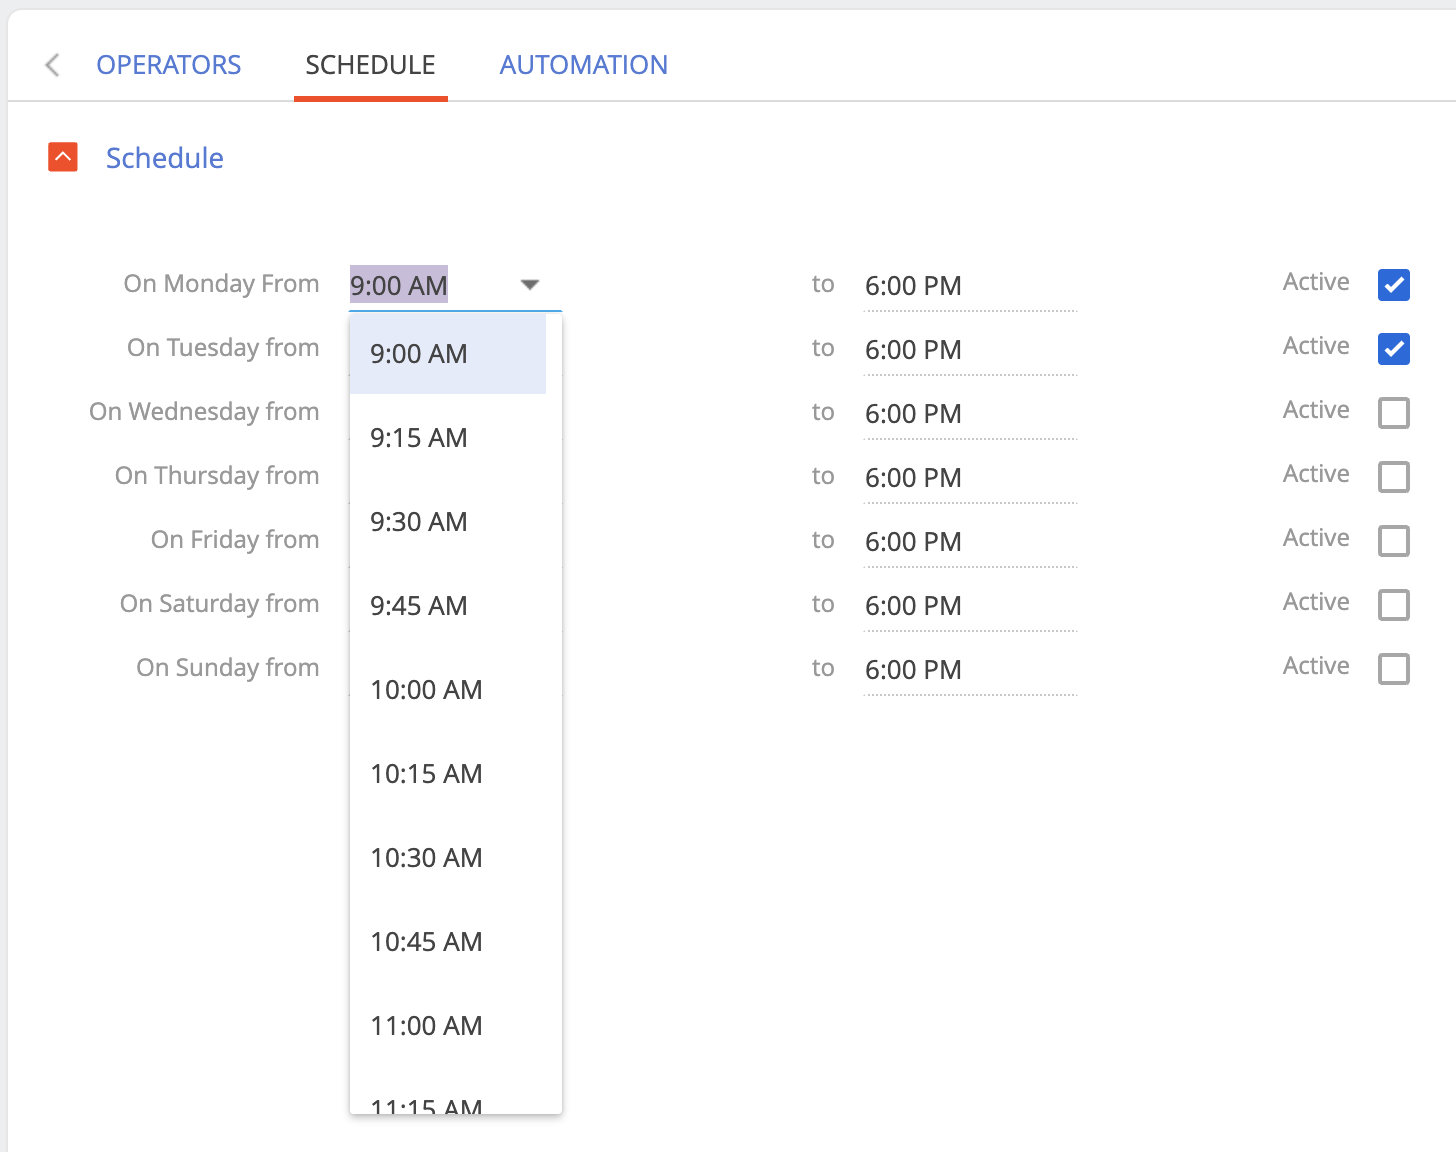
Section titled “Schedule tab”Use this section to define operators’ availability by day and time for this channel.
-
Check Active for any day to enable scheduling for that day
-
Once the checkbox is selected, you can set the Start Time and End Time for that day (from 9:00 AM to 6:00 PM is selected by default)
-
You can select time values from a dropdown list with 15-minute intervals (6:00, 6:15, 6:30, etc.), or manually enter any custom time (6:03, 6:09, etc.)
-
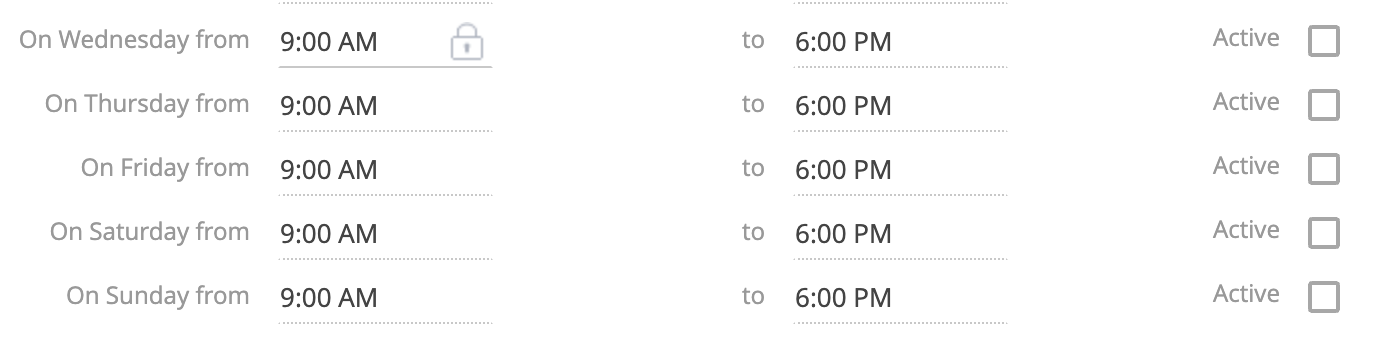
If you remove the Active checkmark, the time fields become locked (a lock icon 🔒 will appear when you hover time field over) and can no longer be edited
-
If no day is marked as active, the operator will not be assigned any chats based on schedule
Channel Schedule Logic
Section titled “Channel Schedule Logic”- When the schedule is enabled, operators will only receive new chats created during working hours. Chats received outside working hours remain in the system and can be picked up manually by operators when they have free time.
- Chats received outside of working hours will still enter the system but are marked as offline.
- Offline chats are not auto-assigned to any operator, even when operators go online.
- If the Schedule feature is not used, then all unassigned chats received during offline hours will be immediately assigned to available operators once they come online.
Automation tab
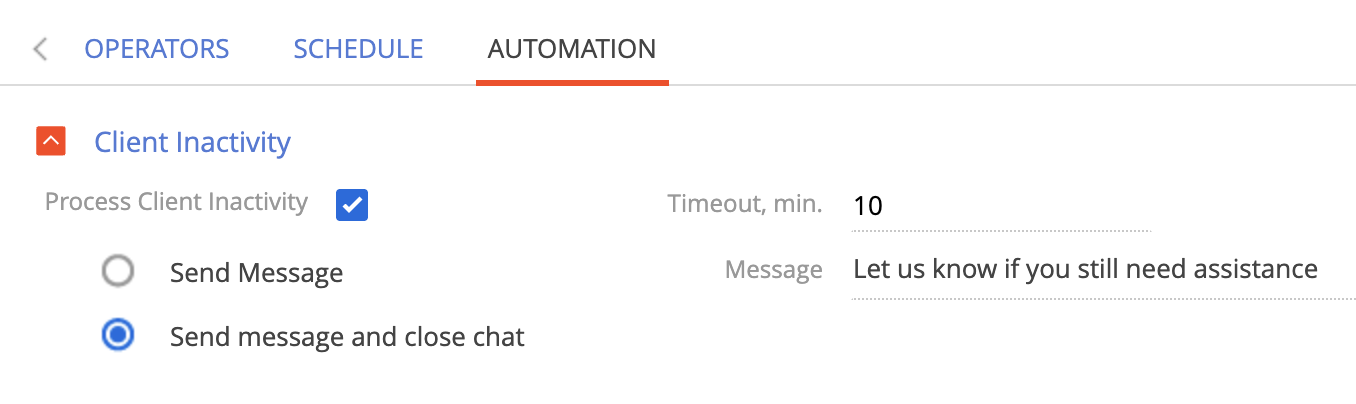
Section titled “Automation tab”This feature allows to automatically send a message and optionally close the chat if the client is inactive for a specified period of time.
- Check Process Client Inactivity to enable the Automation feature
- In the Timeout, min. field, enter the number of minutes of inactivity after which the action will be triggered
- In the Message field, write the message that will be sent to the client after the specified timeout
- Choose one of the following actions:
- Send Message — The message will be sent to the client, and the chat will remain open
- Send message and close chat — The message will be sent, and the chat will automatically close right after